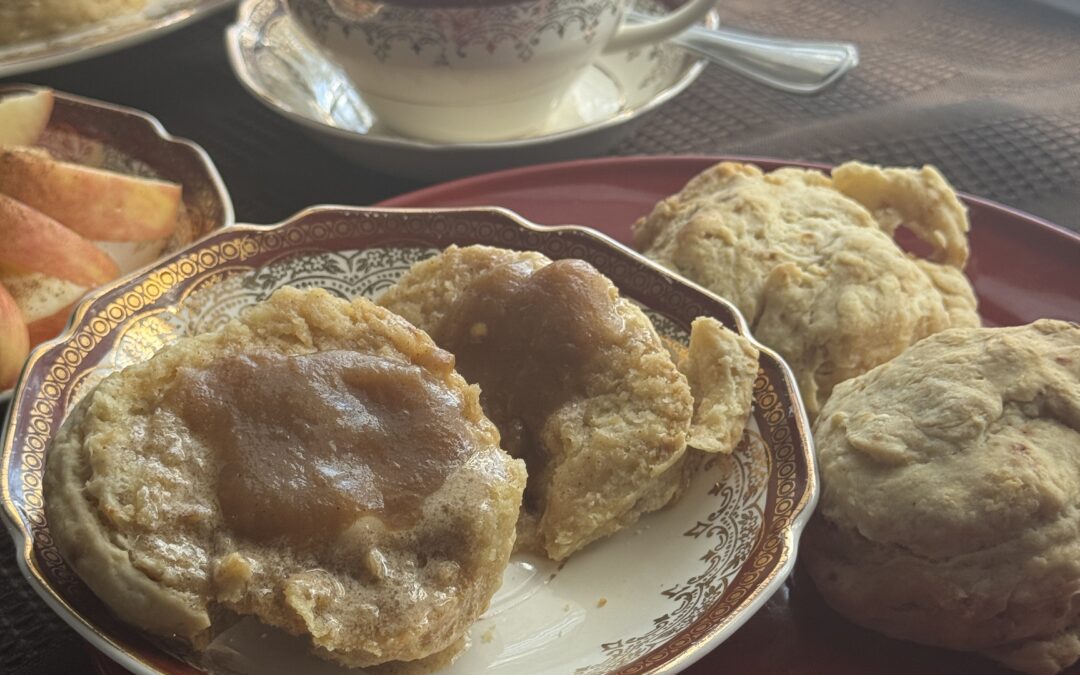
Apple Butter Biscuits
Warm, fluffy, and straight up comfort in every bite. These Apple Butter Biscuits are soft, buttery, and packed with cozy apple flavor, then brushed with a sweet honey glaze that melts right into the biscuit. Perfect for breakfast, dessert, or whenever you need something warm and homemade.
Servings
4-6 servings
Cooking Time
40 min
Apple Butter Biscuits
By: Naysha Rivera
Warm, fluffy, and straight up comfort in every bite. These Apple Honey Butter Biscuits are soft, buttery, and packed with cozy apple flavor, then brushed with a sweet honey butter glaze that melts right into the biscuit. Perfect for breakfast, dessert, or whenever you need something warm and homemade.

Ingredients
- 1 cup plant based milk (unsweeted)
- 1 Tbsp apple cider vinegar
- 2 cups unbleached all-purpose flour*
- 1 Tbsp baking powder
- 1/2 tsp baking soda
- 3/4 tsp sea salt
- 6 Tbsp non-dairy, unsalted butter ( Earth Balance)
Apple Butter
- 3–4 medium apples (about 1.5 lbs), peeled + chopped
- 1 cup water
- 2 tbsp lemon juice
- 1 tbsp orange juice (optional)
- ¼ cup coconut sugar / date sugar and or maple syrup * see notes (add more if you want it sweeter)
- ¾ tsp cinnamon
- pinch of nutmeg (about 1/8 tsp)
- 1 ½ tsp vanilla extract
- pinch of salt
“Honey”
- -2 cups apple juice
- -2 cups white sugar
- -1/4 cup agave syrup
- -juice of 1/2 lemon
- -juice of 1/2 orange
- -1 floral tea bag (I used a camomile tea)
Notes:
Don’t over mix the biscuit dough: When making the biscuit dough, be careful not to overwork it. Overmixing activates the gluten in the flour too much, which can make your biscuits come out dense, tough, and chewy instead of soft and flaky. You want to mix just until everything comes together—lumps are actually a good thing here for that perfect fluffy texture.
Make ahead + freezer friendly: These biscuits freeze beautifully, so you can prep them in advance for fresh-baked comfort anytime. They’ll last up to 2–3 months in the freezer.
Sugar choice in the apple butter:
I like to keep things a little more refined-sugar free when I can, so instead of white sugar, you can easily swap in coconut sugar,date sugar and or maple syrup. They still give that rich, caramel-like sweetness that pairs perfectly with the apples, but in a more natural way. The flavor stays just as cozy and deep—just a little less processed.


Step by Step Instructions
Biscuit Instructions:
Preheat oven:
Set your oven to 400°F (205°C) and line a baking sheet with parchment paper. In a small bowl add your milk and apple cider vinegar together – mix and let sit for 5 min to “curdle”
Mix dry ingredients:
In a bowl, combine the dry ingredients
Cut in fat:
Add cold vegan butter (cut into chunks) and cut it into the flour until it looks like coarse crumbs. This is what helps create flaky layers.
Add liquid:
Pour in cold plant milk a little at a time and gently mix until the dough just comes together. Do not overmix.
Shape biscuits:
Lightly flour your surface, gently pat dough down, and fold it over itself 2–3 times for layers. Cut into rounds or rustic squares.
Bake:
Place on baking sheet and bake for 15–18 minutes or until golden brown on top.
Apple Butter:
Clean + prep the apples:
Start by thoroughly washing your apples to remove any dirt or residue. If they have wax on them, scrub well under warm water or use a little vinegar rinse. Peel the apples if you prefer a smoother, lighter apple butter (you can also leave the skin on for a deeper color and extra nutrients). Then core and chop them into small chunks.
Start cooking + build flavor:
Add the chopped apples into a large pot along with lemon juice, cinnamon, nutmeg, vanilla, salt, and sugar. Stir everything together and cook over medium heat for a few minutes until the mixture becomes fragrant and the apples start to soften.
Add water + simmer:
Pour in the water, give everything a good stir, then bring it to a gentle simmer. Let it cook for about 20 minutes, stirring occasionally to make sure nothing sticks or burns at the bottom of the pot.
Blend until smooth:
Once the apples are completely soft and broken down, use an immersion blender (or carefully transfer to a blender) and blend until silky smooth and creamy.
Thicken + finish:
Return the blended mixture to low heat and let it simmer uncovered so it can thicken and deepen in flavor. Stir often to prevent burning. If you want it thicker, mix 1 tsp cornstarch with 1–2 tsp water to create a slurry, then stir it into the apple butter and cook for a few more minutes until it thickens to your desired consistency.
Cool + store:
Remove from heat and let it cool completely — it will continue to thicken as it sits. Store in a jar or airtight container and enjoy
Apple Honey
Combine everything in a pot:
Add apple juice, white sugar, agave syrup, lemon juice, orange juice, and the chamomile tea bag directly into a saucepan. Stir well to help the sugar start dissolving.
Heat gently + infuse:
Bring the mixture to a gentle simmer over medium-low heat. Do not let it boil aggressively — you want a slow, steady simmer so the flavors stay smooth and don’t burn or get bitter. Let the tea bag steep directly in the liquid as it heats to infuse that light floral note.
Slowly reduce:
Lower the heat and continue simmering for about 25–40 minutes, stirring often to prevent sticking or scorching. The mixture will slowly reduce and start turning into a glossy syrup.
Remove tea bag:
Once the floral flavor has infused to your liking, remove the tea bag and continue reducing the liquid until it thickens.
Check consistency:
It’s ready when it coats the back of a spoon and has a thick, honey-like texture. Keep in mind it will thicken even more as it cools.
Cool + store:
Remove from heat and let it cool completely before transferring to a jar. As it cools, it will become even richer, thicker, and more syrup-like 🍯✨